What is the Puppet Tool?
The "puppet tool" used in the program AfterEffects helps to make whatever you're animating come alive. This tool allows you to create a mesh on your character so that you can more fluidly animate it. I was too embarrassed to ask for help with it when my class was still frequently using AfterEffects, so it took me a long time before I actually learned what it was. This tutorial is for anyone who's interested in learning about AfterEffects and might be having trouble figuring out what to do.
What to Do

- To start off, you need to select the Puppet Pin tool, which is in the upper left-hand corner of the screen.
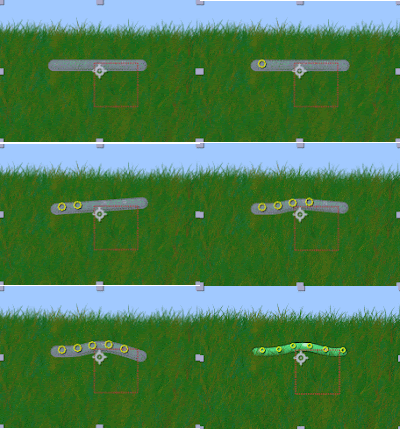
- After it's been selected, put as few pins on each separate layer of you character as you can, but don't put too few.
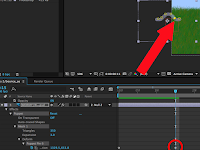
- That last step was the easiest. Now, it's time for the hardest part. At the bottom of the screen is the animation timeline. On the left side is your layers, which includes your character. Under one of your character layers, choose Effects > Puppet > Mesh # > Deform > Puppet Pin #. Create a point in your timeline, then drag the time indicator to another point in the timeline and move a pinpoint on the screen. If you press play, you'll be able to see it move!
Just In Case You Need Some Pictures


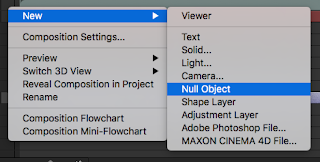
Step 1: Put the pinpoints Bonus(?) Step: Add a Null Object to the
on the object. object you're animating if you want it to
move across the screen.

Step 2: Create a keyframe in Step 3: Move the pinpoint
one spot. into a different position &
create a new keyframe.
After you've made several keyframes, animate it!
Sorry it's bad, but I hope you get the point.
Helpful Websites (Maybe)
- Animating with Puppet tools
- After Effects: How to use the Puppet tool | lynda.com tutorial (this is kind of long, but I think it's kind of helpful)
- Brenna (っ• ◡•)っ


No comments:
Post a Comment